Okay so first off, my boyfriend and I are both very sentimental people. This is typically not a bad thing…until we travel and find many little items to bring back from the trip that have no real place to stay in our home. I was recently going through a box full of seemingly random stuff when I came across the beads we collected from our NOLA trip during Mardi Gras 2020. I thought about tossing the beads because i thought, “what in the world are we supposed to do with these?”
Then looked across the room and saw the empty photo frames I bought to decorate and I had an amazing idea! Why don’t I just glue these things onto the frame and add a picture from the trip to it? Genius, if I do say so myself. 😉
I’d also like to make note that I am suuuper cheap and thrifty and am proud to announce that you can create this project for as little as $1.54!!! Woohoo, that gets me so excited! How do you manage to make this for so cheap, you ask? First off, I’m a craft supply HOARDER so I already had all of the things needed (so if you happen to keep paint & glue on hand like me, you will be good). Secondly, the wooden frame was $1.08 with tax from Walmart (in-store only, found in the wood section of the craft department). Printing the photo from Walgreens cost me about $0.46. The beads from Mardi Gras cost me…..you guessed it! ZERO dollars!
You can totally take this idea and run with it using other random items you obtain from travel adventures. I plan to make more of these with random free items collected from trips once we’re able to start traveling again.
To make this Mardi Gras themed frame you’ll need:
- Wooden frame
- E6000 glue
- Gold paint
- Paint brush
- Mardi Gras beads

Step 1: Paint the entire frame gold. I ended up having to do three coats in order to achieve the color I wanted and you will likely need to do the same. **Pro Tip – use a blow dryer in between coats to make it dry faster instead of having to wait overnight.
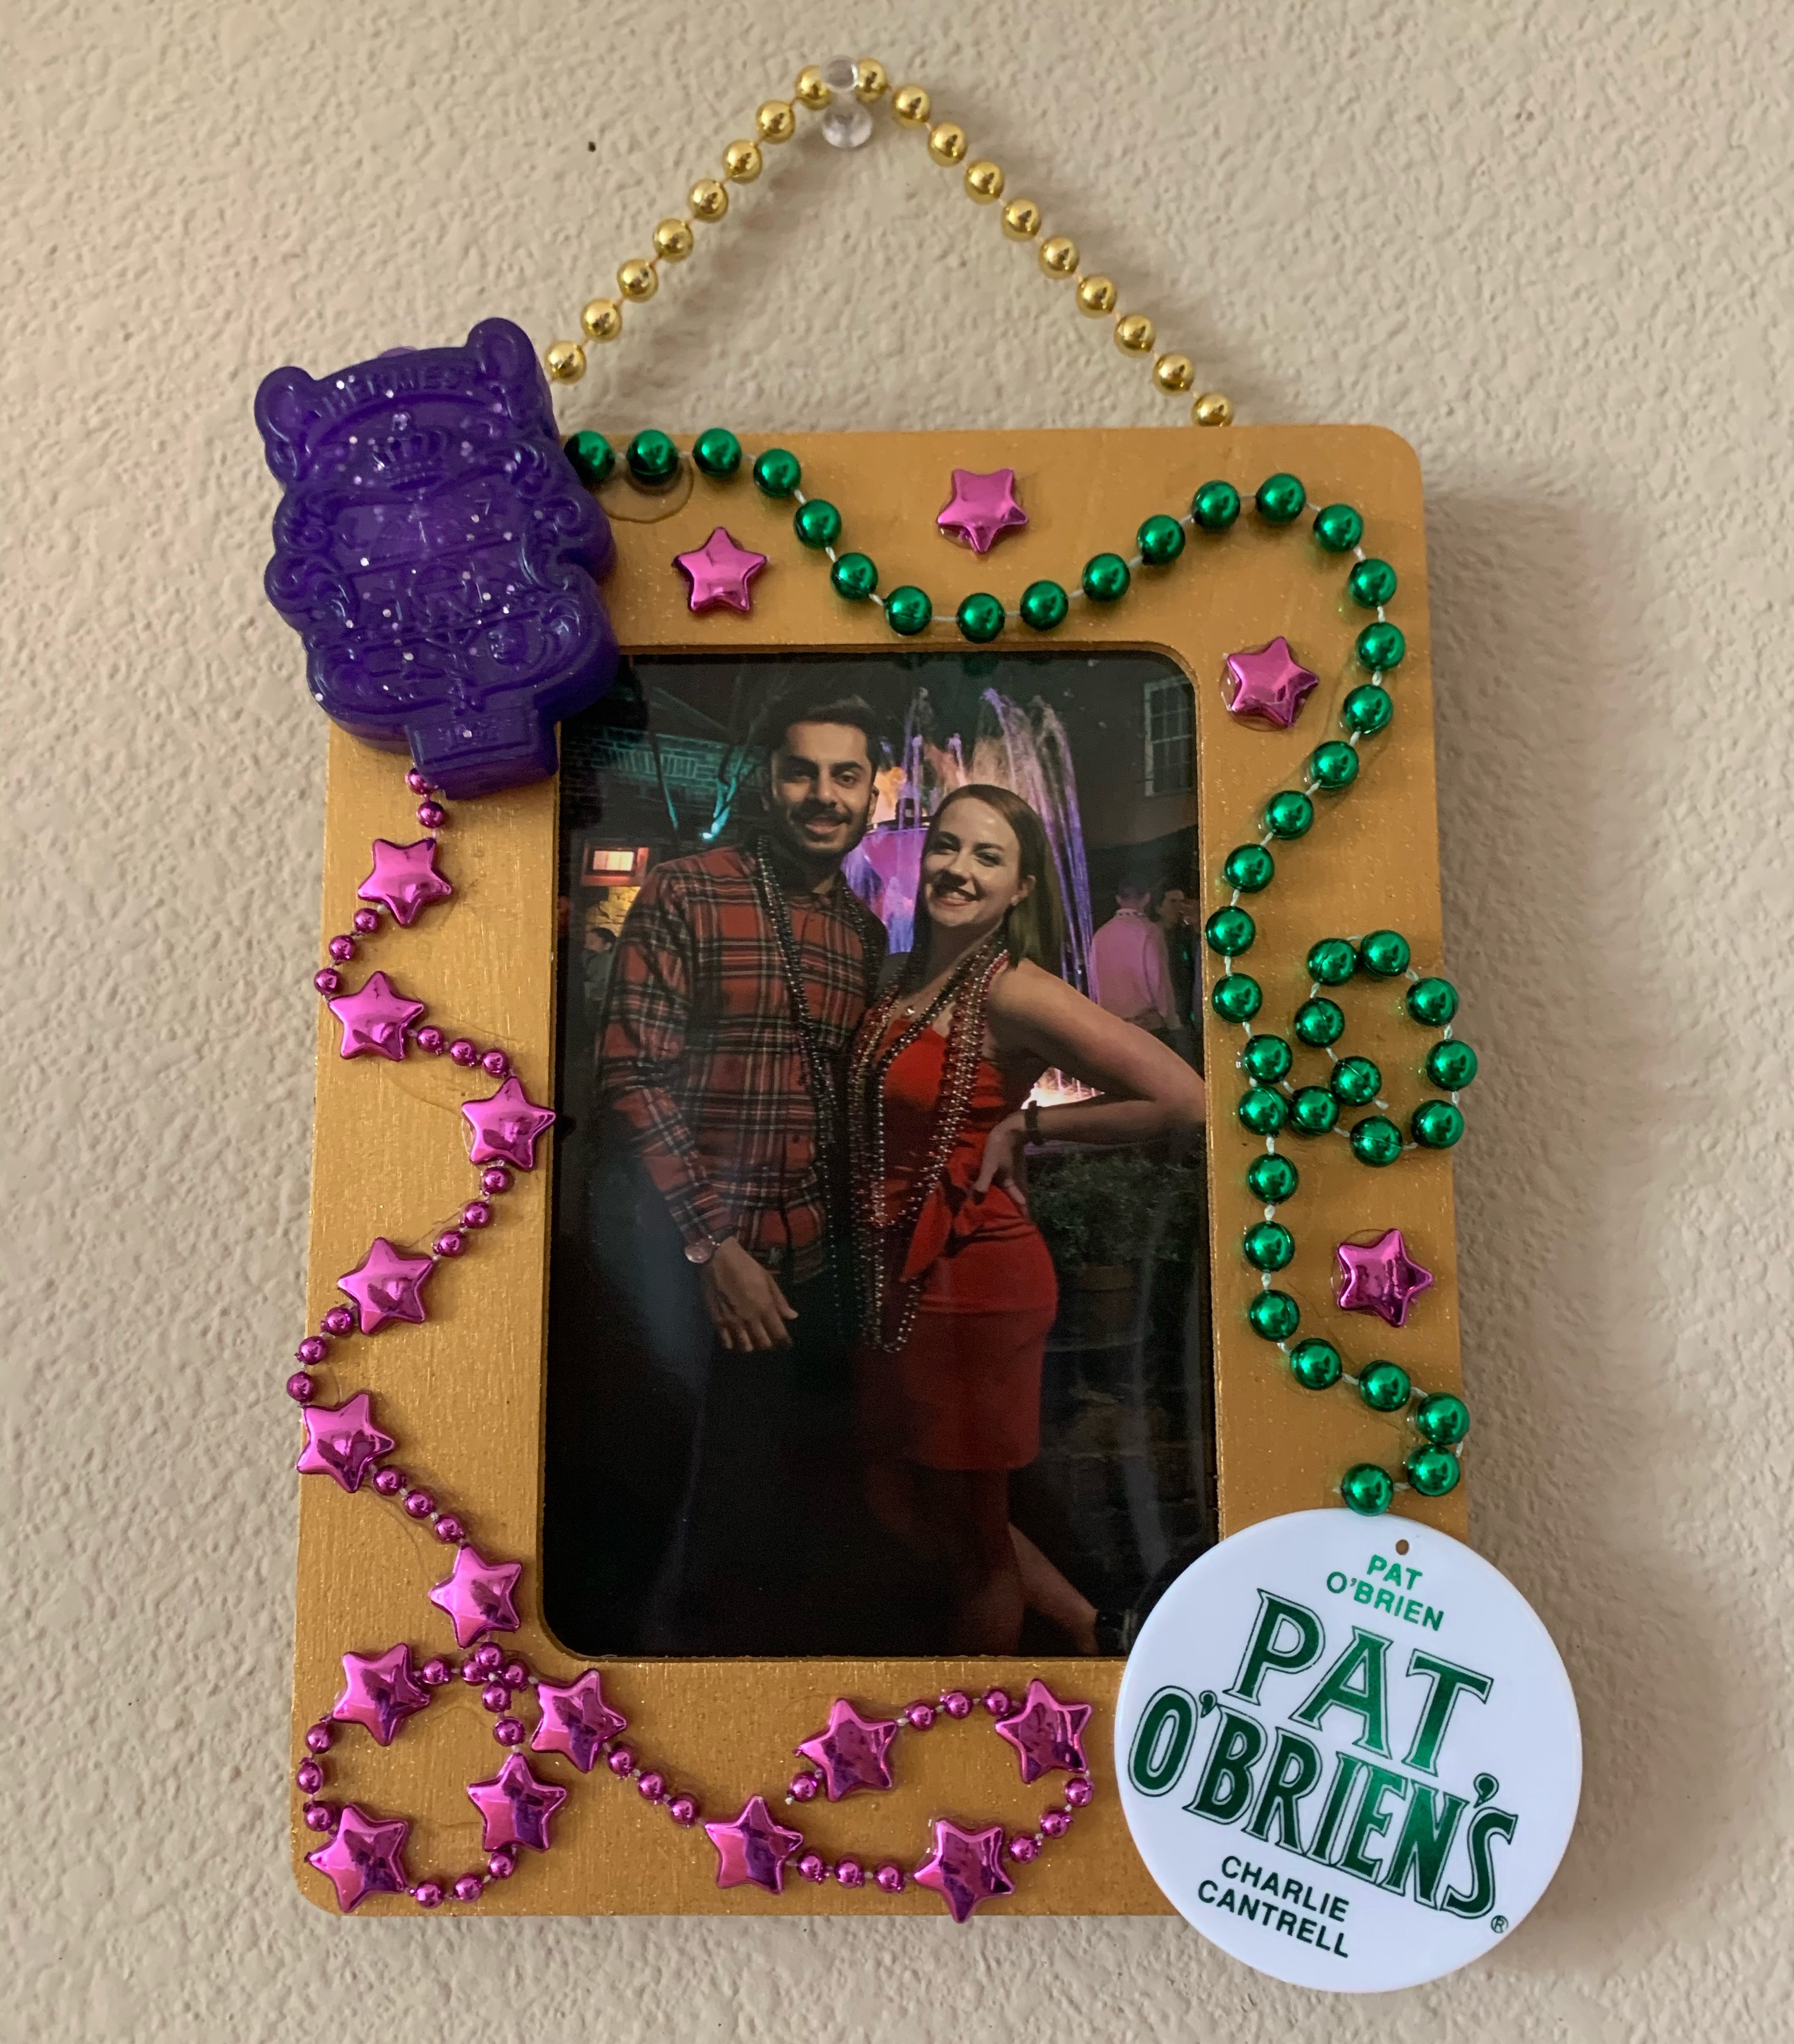
Step 2: Remove any hanging items from the beads (for my frame, I cut the “Pat O’Brien’s” medallion and the light-up purple piece) and cut the beads to the desired length.

Step 3: Play around with arranging the beads and items until you find your desired layout. Begin by gluing the larger items first with the E6000 then slowly start gluing the beads from the beginning of one strand to the end. Get creative and cut up beads and place them in spots as fillers to add to your design! Let dry overnight. **Pro Tip – take a photo to refer to during the gluing process in the event the beads get all shuffled around.


Step 4: Cut one strand of beads into two pieces – one that’s 4 inches long and a second one that’s 8 inches long. Once the front of the frame is completely dry, use the E6000 glue to attach the 4-inch strand at the bottom of the frame. Center the strand to the best of your ability (below you’ll see that my best ability is clearly just average – good thing this is on the back). Then glue the 8-inch strand near the edge of the top, leaving about half an inch from the side edges.
**It’s important to glue both strands in order to keep the frame from hanging lopsided once hung on the wall.

Aaaaand voila! Your frame is now complete. Print a photo (I use Walgreens Photo because it’s easy and cheap) from the trip that represents the items you’ve added to the frame. These beads were from Mardi Gras in New Orleans and the photo I placed in the frame was taken at Pat O’Brien’s – a bar where a few of the beads were obtained.


Click this link to see the light-up piece actually light up. It’s a really fun party trick to show friends when they’re over. 😉 What are some items that you plan to use to make your next souvenir frame? I’m excited to hear about it! Drop a comment below.
Leave a Reply