
Okay, be honest with me… How many times have you and your significant other had the HARDEST time picking a restaurant to have dinner at? Or wanted to go on a fun date together on your only free night of the week…but had no idea what to do?
I’ll be real with you – this has been a constant issue with my boyfriend and I. Sometimes even ending in an argument because we can’t agree on where to eat! That’s no fun and neither is making a last minute decision… So I came up with a cute, fun solution – “Date Deciding” Jars! 🙂 It’s a very simple concept that you can DIY so easily at home. It’s solved our “no, you pick” problem completely, if you know what I mean. Ha! Let me explain how it works then we’ll head on into how to make these bad boys.
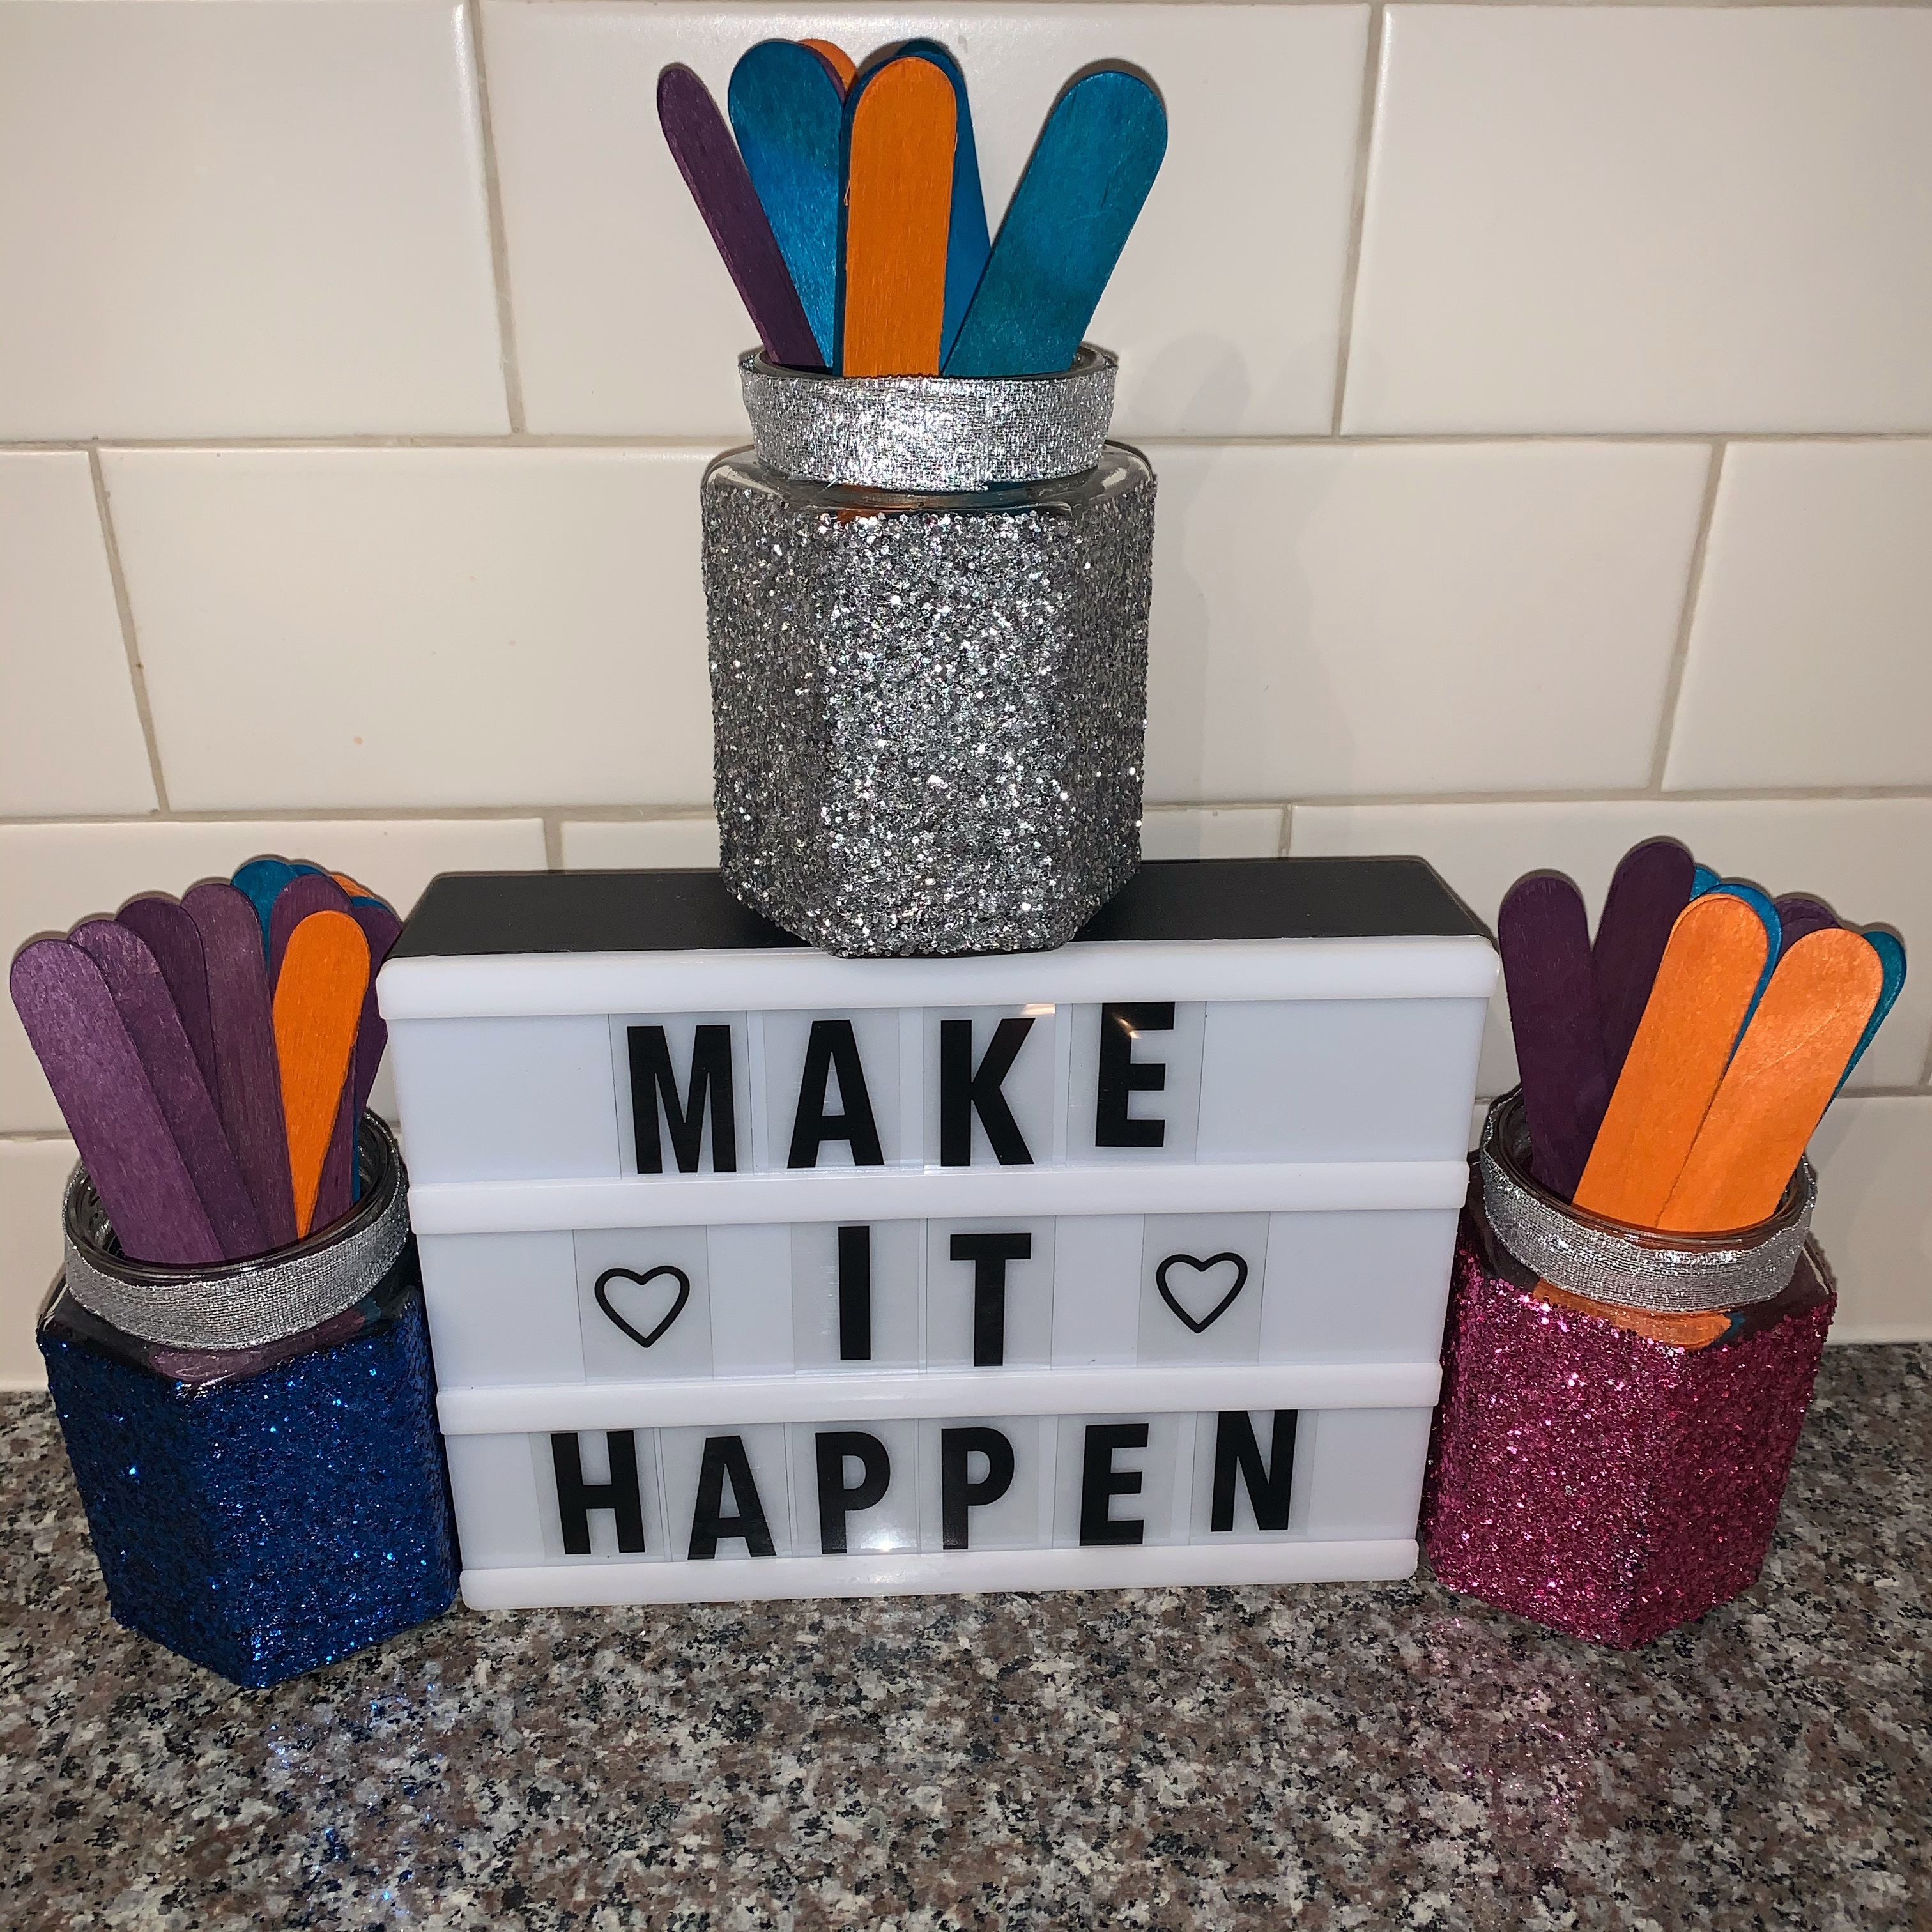
There are three jars – the first one holds the names of restaurants that we like – “dinner time”, the second one holds date night activities (3 hours or less needed) – “date night”, and the third one holds daytime date activities (half or full days time needed) – “day date”. I decided to take it a step further for the “dinner time” jar and color-coded the sticks for that one as follows: Green = $25 or less for two meals, Yellow = $25-$50 for two, Red = $50+ for two and reserved for special occasions. When it’s time for us to decide where to eat or what to do for a date, we grab the jar needed, close our eyes and pull a random stick – then BOOM! Decision made. 🙂 We also made a pact together that whatever we draw, we have to stick with no matter what in order to be fair to each other.

As you can see from the photo above, the silver jar is “dinner time” since that’s the only one I chose to color-code. This is YOUR project so have fun with it and color code all three (or NONE) of them if you want! 😉 Now let’s get down to business {I reallllllly hope you sang that to the tune of “I’ll Make A Man Out of You” from Disney’s Mulan} on what all it will take to make these for yourself!
You will need:
- 3 empty jars (I eat a lot of jam so these are repurposed! I really hope you’ll choose to do the same but if not, you can purchase empty jars really cheap at Dollar Tree)
- Mod podge
- Glitter in the color(s) of choice
- 1 pack of multi-colored wooden sticks
- A paint brush (one that you don’t mind possibly ruining)
- Ribbon roughly 5/8″ thick
- Clear E6000 glue
- Black sharpie
If you’re re-purposing old jars, you may have a label on it that you need to get rid of. The BEST way to do so is to get a tub that the jar fits in (or you can plug up a sink instead), fill it with water and ice then submerge the entire jar in the icy cold water. Let sit for at least 20-30 minutes then remove from the water and begin to peel off the label. It should slide off very easily although you may need to use your fingernail to scrape off remaining bits of the glue from the label. I know that there are products like Goo-Be-Gone that will remove the adhesive glue but I’ve found this method to be easier and, more importantly, CHEAPER.
Pro-Tip: if you’re like me and are always looking for ways to save money, be sure to purchase the E6000 glue and Mod podge both at Walmart. Craft stores sell them, too, but at a much higher price.
Directions:
- Take the empty, label-free jars and paint on a coat of Mod Podge around the entire outside. Try not to make it too globby as it will drip off if there’s too much on it.

2. Hold the glue-covered jar over a paper plate and begin to slowly pour glitter over every bit of it that has glue. Gently tap the jar over the plate to get the excess glitter off. It will take a LOT of glitter but having the paper plate underneath ensures that you can pour the excess safely back into the glitter container (fold the paper plate in half and use like a funnel back into the container).

3. Repeat steps 1-2 with all three jars. Let dry over night.
4. Once the jars are completely dry, paint on a second coat of mod podge in order to seal the glitter to the jar. Let these dry over night as well.

6. Once the jars are completely dry with all the glitter sealed to them, take the ribbon and wrap it around the lip of one jar in order to see how much of it you’ll need for each. Cut three of the same length then use E6000 to glue the ribbon around the lip of the jars. This part was a little tricky to do! I put a bunch of dots of the glue around the lip before starting to attach the ribbon to it. Because the glue is clear, I added a red arrow to the photo below so you can see where it’s at. Let glue dry over night.

Aaaaaand voila! Your jars are now complete. On to the next part – adding ideas to the wooden sticks. 🙂 Restaurants will vary depending on where you live as well as personal preference so you’re on your own for those. When it comes to date night and daytime date ideas, I got you covered! I reached out to my friends on social media who gave me wonderful, fun date ideas on top of the ones I already had thought of. Below you’ll find a list for each!
Date Night Ideas:
- Movie Theater
- Ice Skating
- Kayaking/Paddle boarding
- “Goodwill Swap” – you each go to Goodwill on separate occasions and buy an outrageous outfit for your significant other, then go out to dinner wearing the outfit picked out for you
- Bowling
- Go Karts
- Dave & Busters
- Couples cooking class
- Bingo Night
- Drive-in Movie
- Picnic in the park
- Roller skating
- Billiards
- Canvas Painting Class
- Take a couples dance class
- Mini-golf
- Check out a local comedy club
Day Date Ideas:
- Museum Day (go to one or a few depending on your city)
- Zoo Day
- State Park day trip
- Biking around town/on bike trails
- Axe Throwing
- Brewery Tour
- Winery Tour
- Volunteer to walk dogs at a shelter
- Beach day
- Horseback riding
- Farmers Market trip
- Check out a local art gallery
- Dress up and do your own photoshoot (one with a theme could be ever more fun!)
- Go test drive your dream cars
- Go people-watching at the mall and make up crazy stories about strangers passing by
- Go check out a local fruit picking farm
- Play tourist in your own city by riding public transportation and getting off somewhere interesting to explore
Some of these activities are only available depending on where you’re located so please keep that in mind! If you have an amazing idea to add, PLEASE feel free to leave a comment below because the more the merrier. 😉