
Okay, so we all know that it’s sooo much easier to just buy a generic costume at the pop-up Halloween store that shows up in town once a year… But the satisfaction of making your OWN, unique costume that no one else is wearing plus getting to tell people, “yes, I made this”, is worth so much more than that $50 Harley-Quinn costume you purchased last year. Trust me on this!
Below is a list 6 of the costumes that I made for myself over the years, along with simple instructions on how you can do this yourself. While I am skilled with a sewing machine, a lot of these do not require any sewing skills whatsoever. Although, I did throw in a 7th costume that I did utilize my sewing skills to create. I am not including this as part of the DIY list because it’s not easy to create if you do not know how to sew. The purpose of this article is to empower you to create your own costume because YOU ABSOLUTELY CAN!
So, go ahead and take a look at the list, then try your hand at creating your Halloween costume this year! Get creative – there is no right or wrong way to create a costume… Just don’t forget to add important pieces, such as wings, if you’re planning to be a fairy. 😉
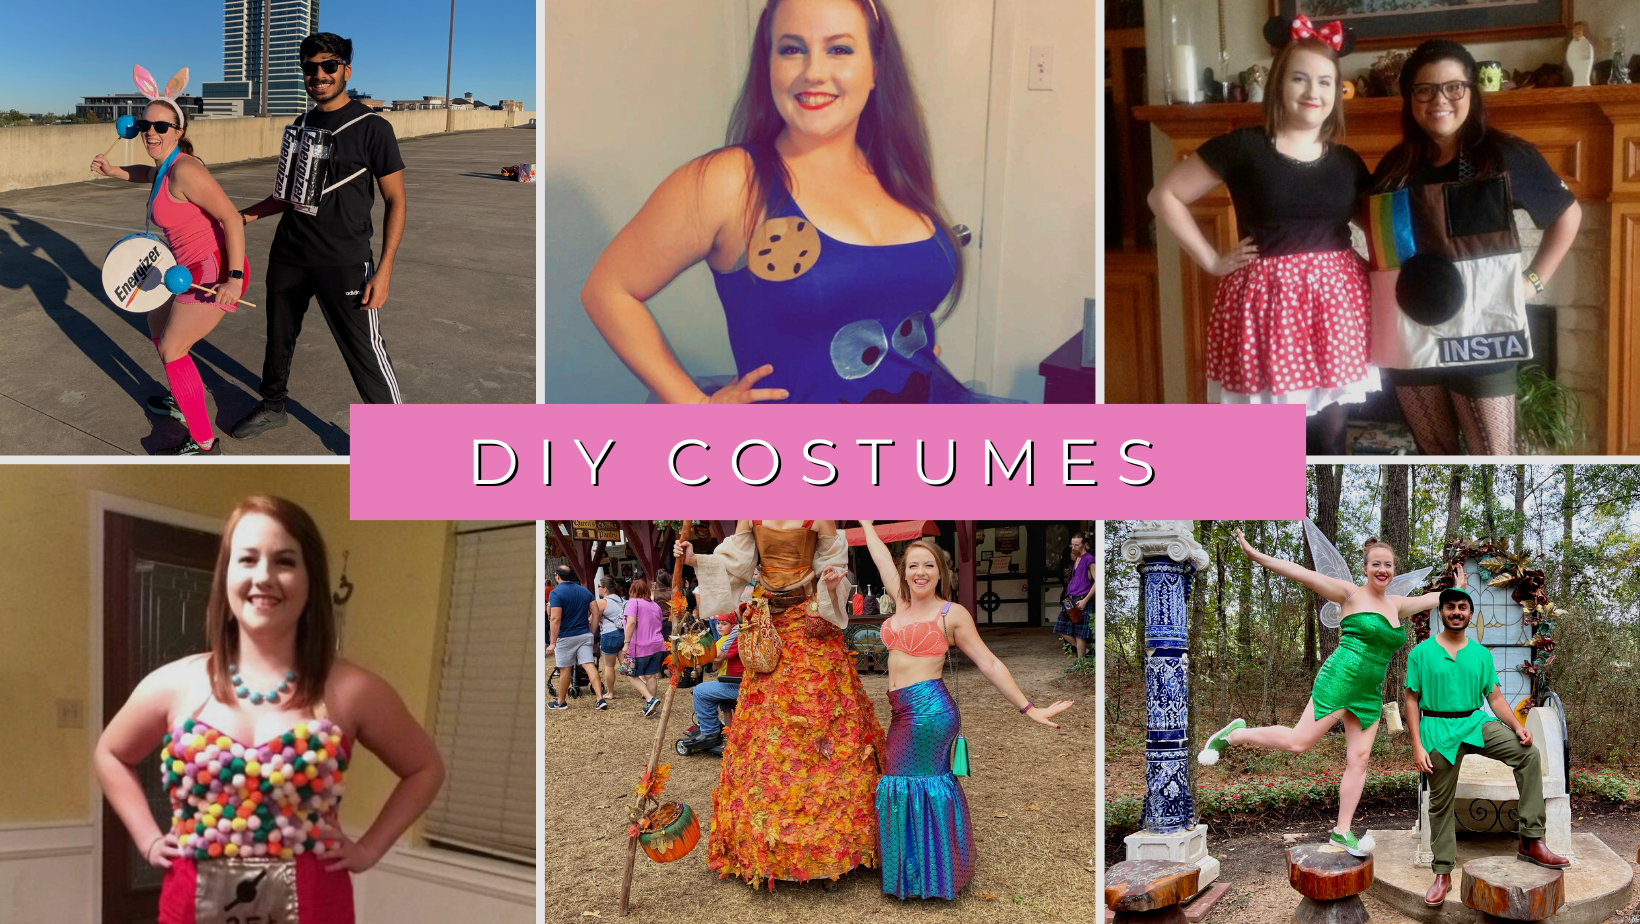
1.The Energizer Bunny
This costume was suuuper easy to make! I wore this outfit to a themed Camp Gladiator workout that my trainer, Renee Rivellini, hosts every year called The Great Pink Pumpkin that helps to raise awareness for breast cancer. That said, this is a perfect workout costume as the accessories are removeable and can be worn before/after the workout itself. The costume consists of the following pieces:
- Pink shorts (here are some inexpensive biker shorts found on Amazon)
- Pink top (here’s a cute crop workout tank found on Amazon)
- Bunny ears and tail
- Battery Pack (instructions below)
- Sunglasses
- Drum (instructions below)
- Drumsticks (instructions below)
- Pink shoes
The Battery Pack – You will need the following materials: 2 individually wrapped paper towel rolls, foil, black duct tape, clear packing tape, this image blown up to fit an 8×10 page then printed out twice, one package of 1-inch elastic and E-6000 glue. Keep the paper towels in their original wrapping and cover them with completely with foil. Use the E-6000 glue to secure the foil to the rolls. Next, take the black duct tape and wrap it around the cylinder shape of one of the paper towel rolls, from the top until about 4 inches down. Measure down 4 inches from the bottom of the tape and leave the foil visible for this 4-inch-space. Take the black duct tape and wrap it from the bottom of the space to the very bottom of the roll. Do the same for the second paper towel roll. Next, cut the two images to fit the length of the paper towel rolls; use the clear packing tape to secure one image onto each roll to create your battery. ***Be sure to cover the entire image with clear packing tape so that it will be weather-proof!*** Now, use the E-6000 glue to glue the two batteries side by side. Let dry over night. The next day, measure the elastic to fit as straps for your battery pack; cut and then glue the edges to the top and bottom of your battery pack – think of how the straps for a backpack look while doing this. Let dry overnight. Yay, now your battery pack is complete!

The Drum – You will need: one 12-inch round papier mache box, a red sharpie, white acrylic paint, blue duct tape, E-6000 glue and two printouts of this image. Start by using the E-6000 to glue the lid shut onto the box. Let dry overnight. The next day, paint the entire box white and let dry. Once dry, cut and glue the image to each side of the drum – be sure that they are parallel to each other. Take your red sharpie and draw zigzag lines back and forth along the circumference of the drum (see photo at the bottom). Lastly, take very long strips of the blue duct tape and cut them in half. Carefully place the strips around the perimeter of the drum. Make the strap by folding long strips of the blue duct tape in half then lining each edge up to the top of the blue on the drum and taping it down. Yay! Drum = done!
The Drumsticks – The final piece to this costume puzzle involves the following materials – two 12″ dowel rods, two 4.5″ foam spheres, E-6000 and blue duct tape. Start by using a dowel rod to piece a hole through the sphere, stopping at the core. Remove the rod, pour in some E-6000 then replace the rod. Complete the same process with the second rod-and-sphere set. Let dry overnight. The following day, use the blue duct tape to cover the entire surface of the sphere and – voila! – your drumsticks are complete!
Pair your pieces with a pink clothing, pink shoes, bunny tail/ears and sunglasses to complete your look!


You can choose to make the drumsticks red instead of blue, I decided against it because I didn’t want to have to buy another color duct tape. Also, wear blue flip-flops instead of pink shoes for a more authentic touch!
2.Tinkerbell


I made this costume back in 2009 when I was a sophomore in high school! I wish I had more photos to share but I’m thankful that I was at least able to locate these.
The costume consists of a shirt, skirt, leggings, fairy wings and shoes. Let me break each item down into what I did in order to guide you on how to recreate it.
- A green tank top (such as this one on Amazon)
- Tinkerbell skirt (instructions below)
- Green or white leggings/shorts (here’s an inexpensive pair on Amazon that offers an array of sizes!)
- Fairy wings
- Fairy shoes (instructions below)
The Shirt – This is literally just a plain lime green t-shirt that I bought from either Walmart or Hobby Lobby. I cut the neckline into a v-neck and cut the sleeves off – voila! The top has been assembled. OR you can just purchase a lime green tank top (which is probably easier ?).
Tinkerbell Skirt – I made this skirt but it required very little sewing skills. You will need the following materials: 2 yards of green sheer fabric, 1-inch elastic, and 2 safety pins. Start by measuring the elastic by wrapping it around your waist and cutting it 1-2 inches shorter than the size of your waist, depending on how tight you want your skirt to be. Overlap the edges of the elastic the length of 1-inch then safety pin each of the ends in place. Next, measure how long you want your skirt to be – using your measuring tape, place the top of the tape at your waistline and measure down to where you’d like the skirt to stop. Once you have that number, multiply it by 2 then add 1 to get your strip length. Now, cut your fabric into 4-inch wide strips by your skirt length (your measured length x 2 + 1). Cut as many strips as you can. Afterwards, cut a triangle out of each side of these strips (see picture below for a visual). The final step is to take the center of each strip and create a loop with it one one side of the elastic. Pull the dangling ends through the loop and voila! You’ve got your first piece of the skirt on. Continue this step until the elastic is filled up with strips and there is no empty space. Your skirt is now complete. 🙂 Check out this tutorial (skip down to step 4) for visuals of how to complete this last step.

Fairy shoes – I am so proud of these! I took a pair of Walmart house shoes and spray painted them green (unfortunately they no longer sell the ones that I purchased, but these ones should work just fine!). Then I used a pompom maker and white yarn to create one pompom for each shoe. Lastly, I super-glued one pompom to the toe of each shoe aaaand ta-da! The Tinkerbell shoes are now complete. Even though I used super glue back when I made these, I recommend that you use this fabric glue instead. It will hold much better and will have little chance of falling off throughout wearing them!
I wore white leggings under my skirt because it was very see-through, but you can choose to wear shorts instead. Just be careful not to wear some crazy color because it will be seen through your skirt!!! The fairy wings were bought at either Walmart or a party store. Now your costume is complete and ready to wear! Add some fun, sparkly makeup to complete your look.


Instead of cutting the triangles inward, you can chose to cut them outwards to look more like the bottom Tink’s dress as shown in the picture above.
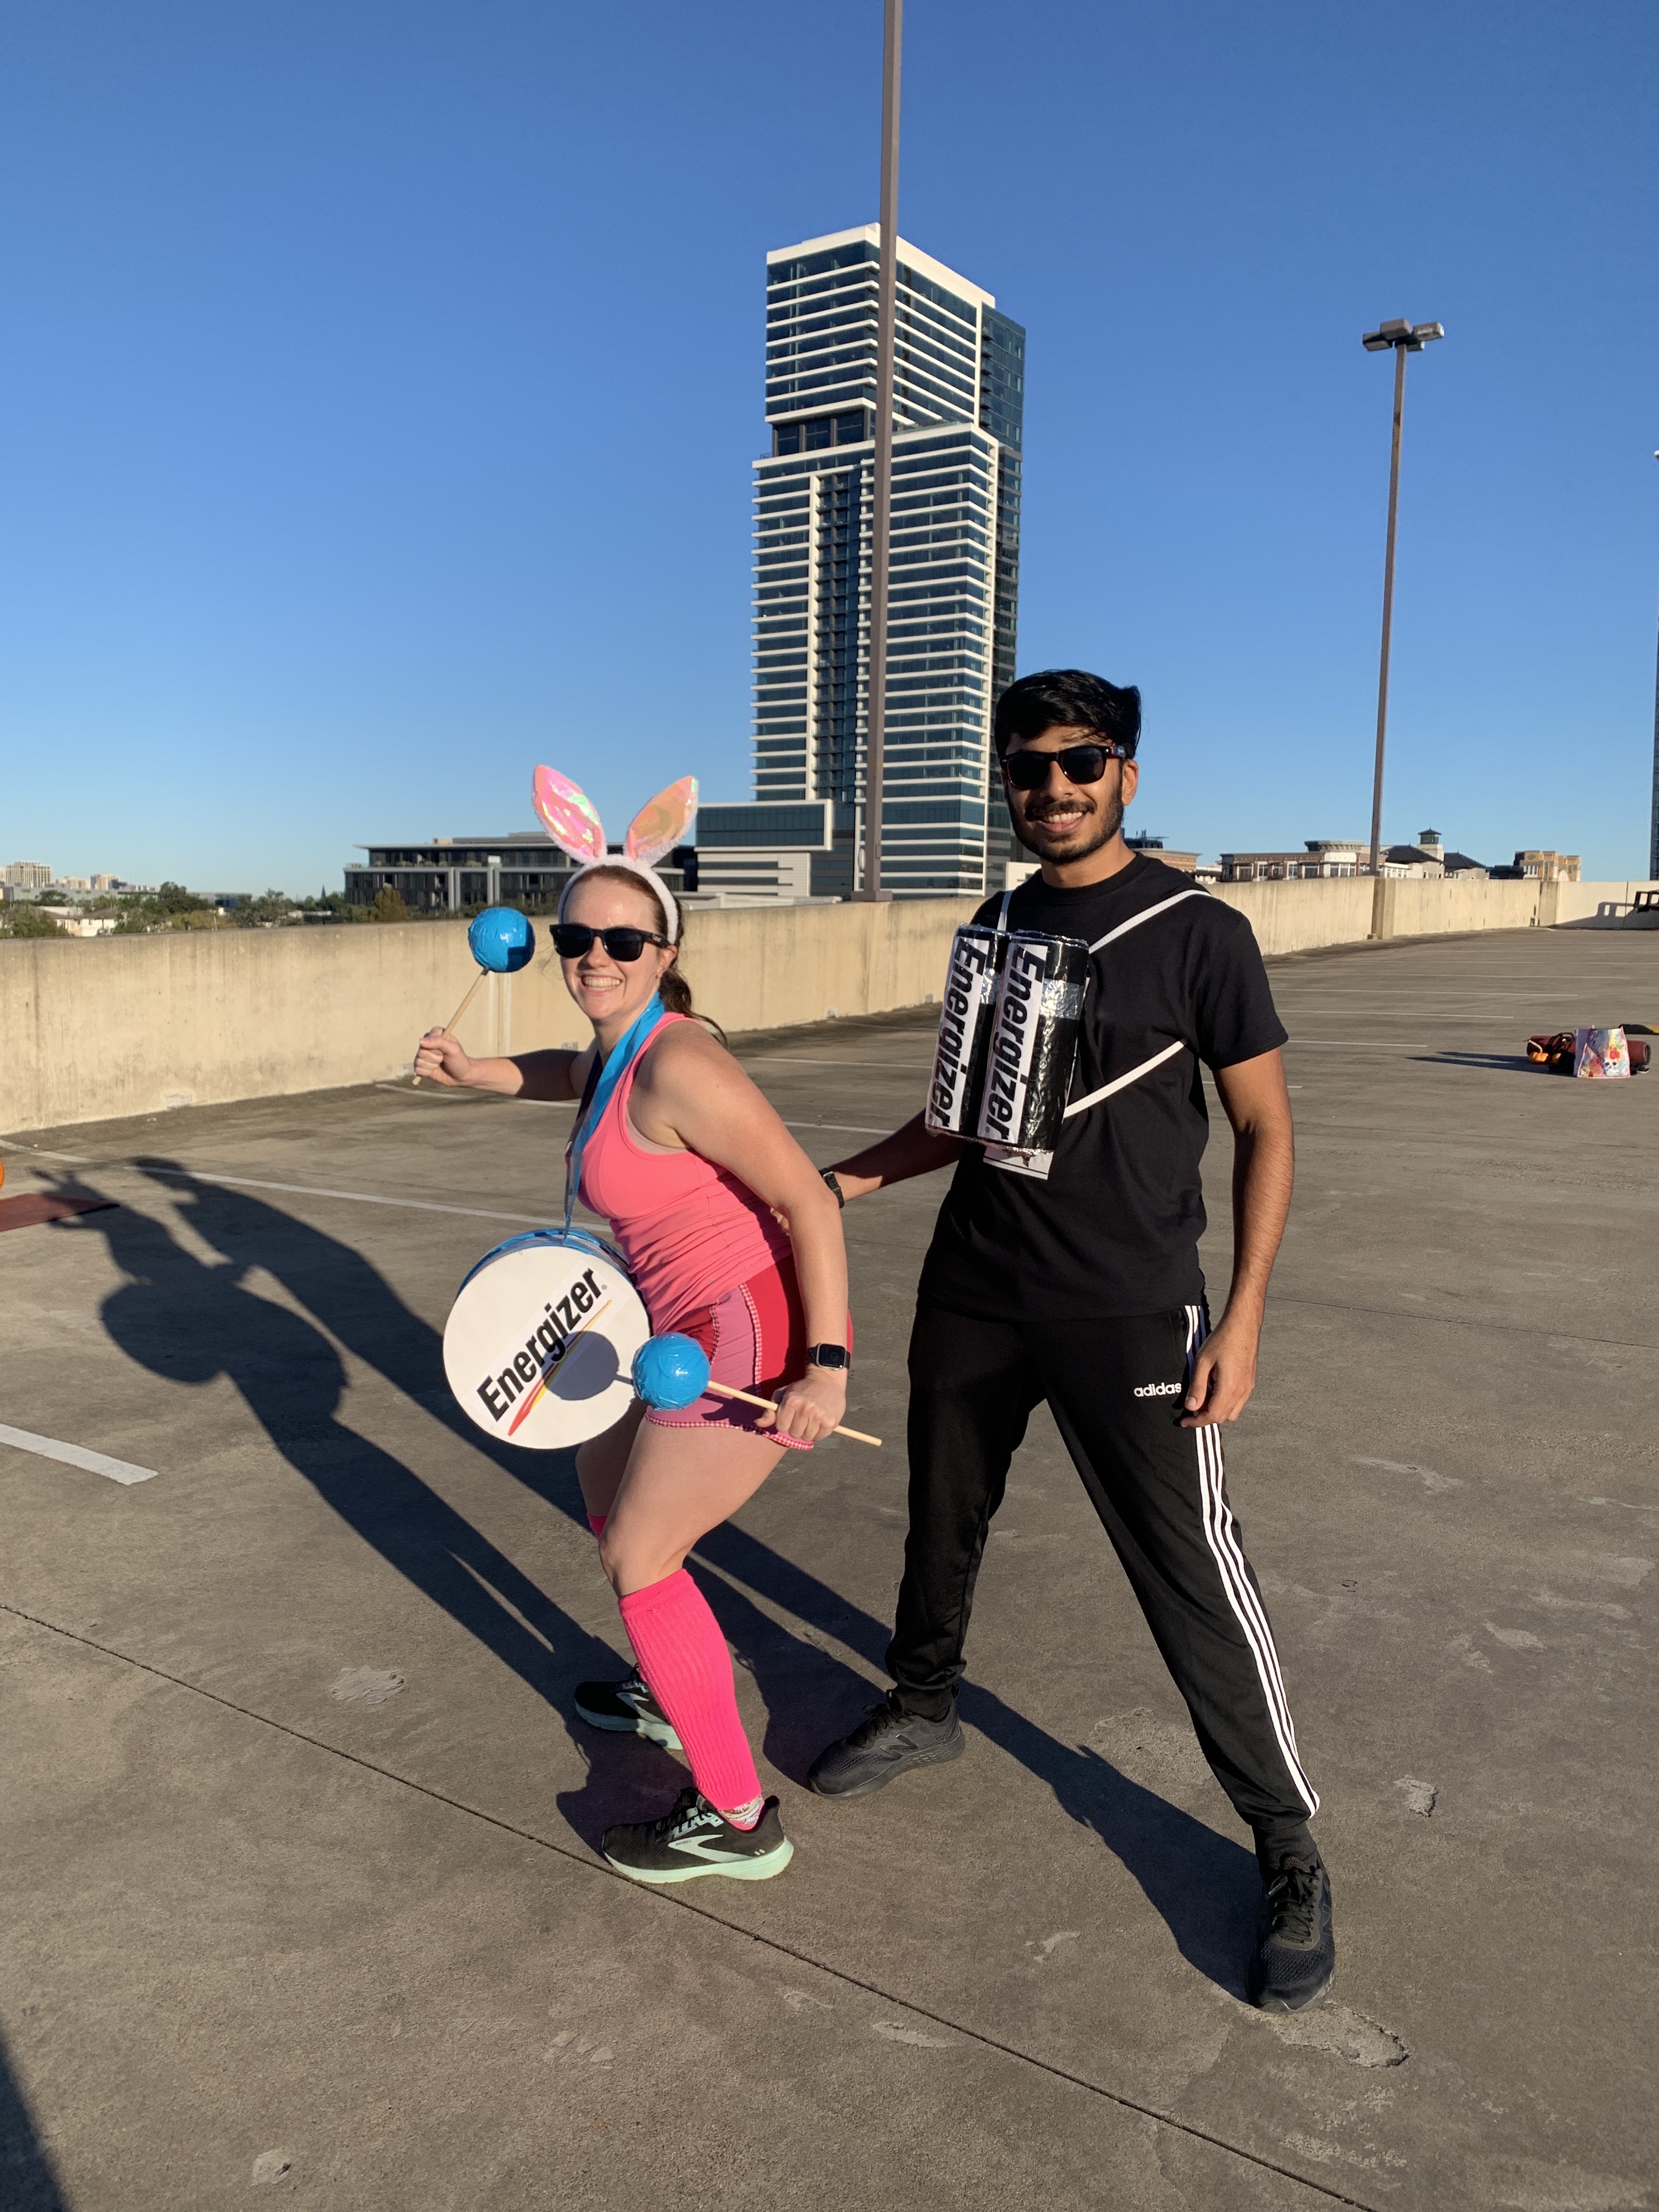
3.The Cookie Monster

I threw this outfit together so last minute – I made the skirt and Cookie Monster tank top just hours before this photo was taken. It’s a simple last-minute option for those needing a costume ASAP. In order to create this look, you will need the following:
- A Cookie Monster shirt (you can purchase one such as this one from Amazon or keep scrolling to learn how to create your own)
- Blue shorts/leggings (here’s an inexpensive pair of leggings on Amazon that can be worn again at workouts)
- Blue shoes
- A blue tutu (instructions below)
- “Cookies”
Cookie Monster shirt – You can purchase one here if you have time to wait for its delivery. If not, head to Target or Walmart and purchase a plain blue t-shirt or tank top. You will also need the following – white fabric paint, black fabric paint, a medium sized paint brush and wax paper. Place the wax paper (wax-side-up) inside the shirt to prevent the front and back from sticking together as the paint dries. Use your paint brush to draw and fill in 2 large white circles for the eyes. As this is drying, create your mouth however you wish it to look – you can make him smile real big or have a crazy-looking-mouth like I did. Use your blow dryer or a fan to speed up the drying of the paint; once the white eyes are dry, add the black pupils. Let dry and now your face is ready for wearing!
Blue Tutu – You will need the following – 3 yards of blue tulle, one 1-inch pack of elastic and 2 safety pins. Cut the tulle into 3-inch by 30-inch strips. Do this with all of the fabric as you will want your tutu as fluffy as possible. Next, measure the elastic around your waist and cut it 1-inch shorter than the size of your waist. Overlap the ends of the elastic by 1-inch and safety-pin together. The final step is to take the center of each strip and create a loop with it one one side of the elastic. Pull the dangling ends through the loop and voila! You’ve got your first piece of the skirt on. Continue this step until the elastic is filled up with strips and there is no empty space. Your skirt is now complete. Check out this tutorial (skip down to step 4) for visuals of how to complete this last step.
“Cookies” – You’ll need 2-3 sheets of light brown card stock paper, a black sharpie, scissors and a handful of safety pins. Cut as many 3-4 inch circles as desired (**tip – trace a round object, such as a cup, to ensure you create perfect circles) and draw on some “chocolate chips” using the black sharpie. Use the safety pins to attach your “cookies” to your tutu and your shirt.

Complete your look by wearing some loud blue eyeshadow! I chose to wear sandals because it was warm that evening (that’s Texas for ya!) but some blue tub socks paired with some blue sneakers would be a cute way to keep those legs warm if needed.
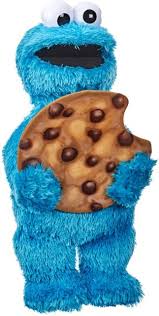
4.A Gumball Machine

So I actually found a tutorial on Pinterest that shows you a suuuper simple way to make this costume, but me being me, I chose to make a much-more-complicated-version for myself. I made this red dress, glued on the pompoms and used fabric paint to create the dispenser for the gumballs. Because this article is meant to give you use ways to DIY costumes, I’m going to pass along the original article for you to recreate this look. However, I highly recommend that you use fabric glue in place of the hot glue gun that she mentions. My pompoms were secured with fabric glue and I only lost 1 pompom total while wearing this dress to 2 different parties… Check out the tutorial here.
For this costume, you will need the following items:
- Gumball top (create it using this tutorial)
- Gumball skirt (create it using this tutorial)
- Black pantyhose
- Black heels or flats
- Circular jewelry *if desired*


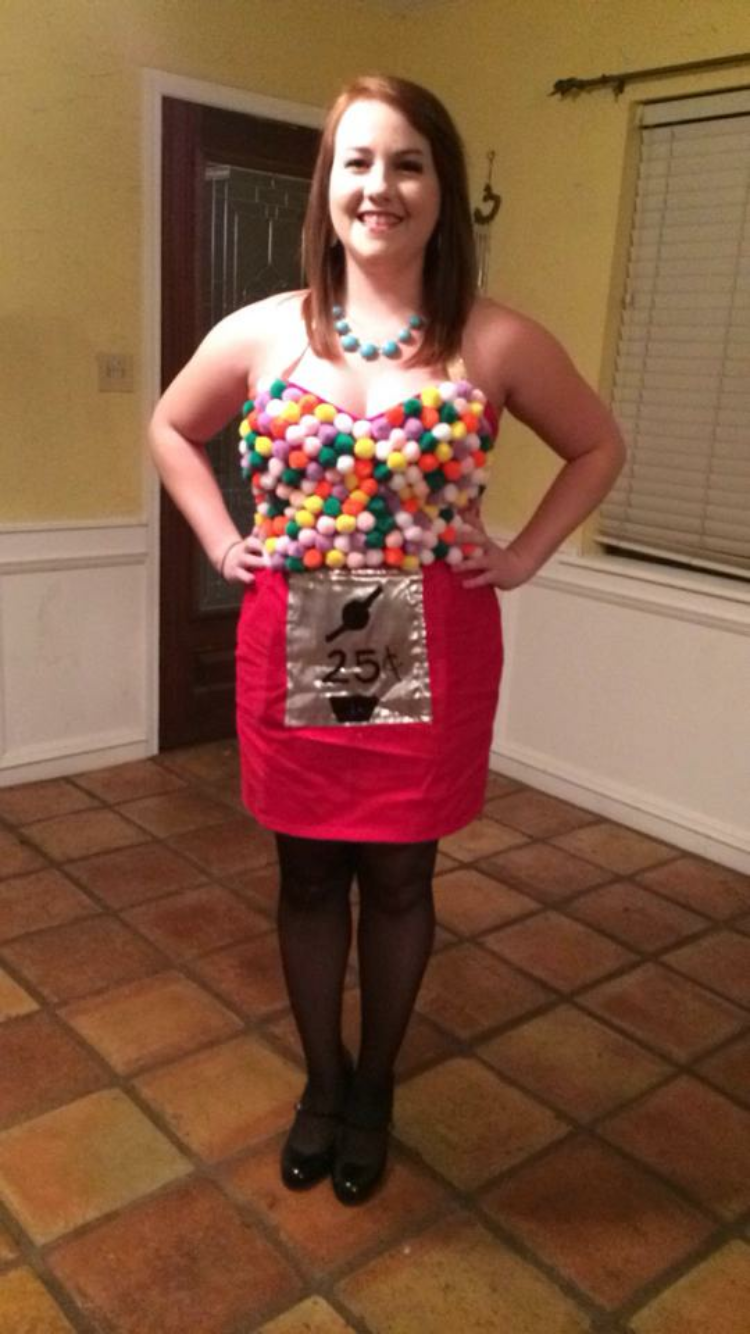
Don’t I look just like a real gumball machine? 🙂 You are sure to impress anyone you see with a costume like this! Give it a try for yourself.
5.Minnie Mouse
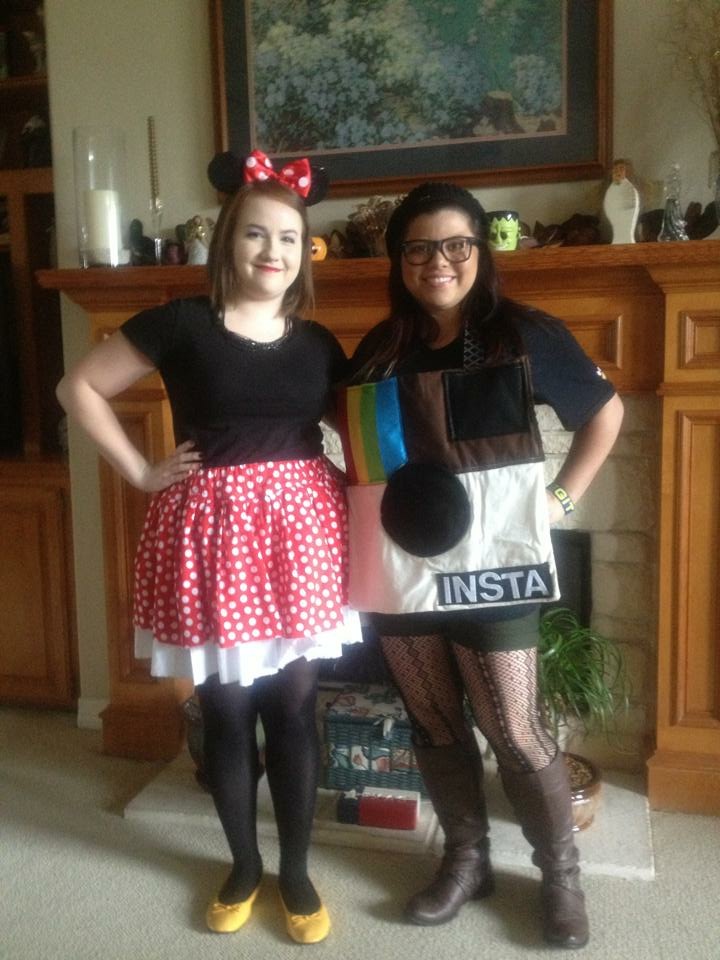
The great thing about this costume is that there are sooo many ways to DIY a Minnie Mouse costume! Being a seamstress, I chose to make my own polka-dot skirt but purchasing one is just as great. You can even do a solid red skirt if you have trouble finding the perfect polka-dot one – refer to the Tinkerbell section and you’ll see my friend, Jordan, dressed as Minnie wearing a solid red skirt.
To create this costume, you fill need the following:
- Solid black t-shirt or tank top
- Red skirt with white polka-dots
- Minnie Mouse ears
- Black pantyhose
- Yellow shoes – here’s a simple pair of yellow flats OR I also recommend this adorable pair found on Amazon


Put on your outfit pieces and you’re good-to-go! I added black jewelry because I’m extra, but that’s not a requirement for the costume. Put on some sexy red lipstick to complete your look and have fun being Disney’s cutest mouse for the night!
6.A Bubble Bath
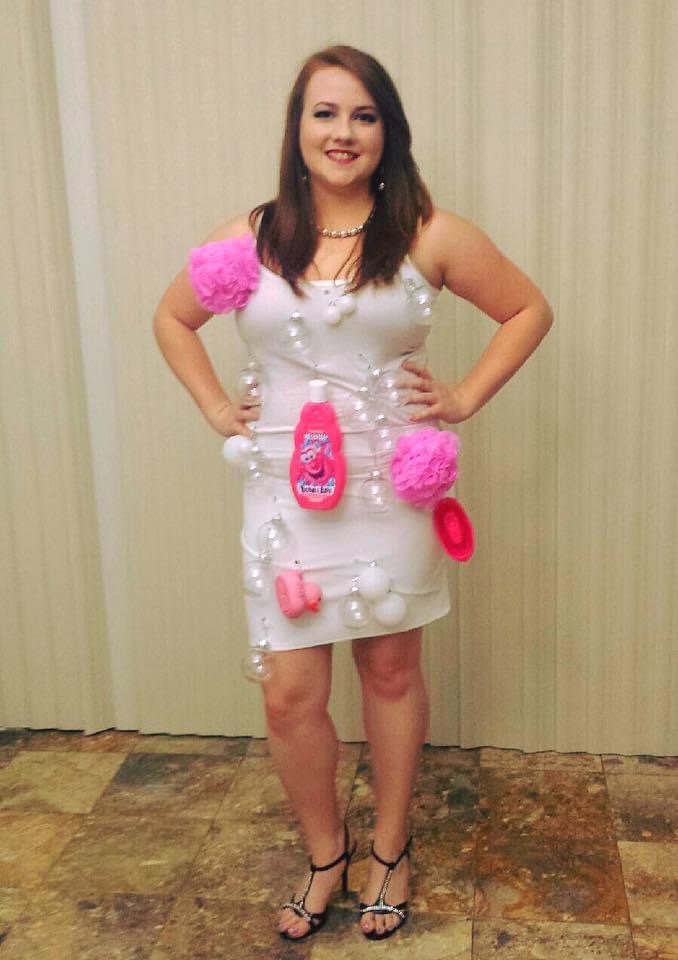
While this costume is very creative and unique, it is not great if you plan to wear it for more than just an hour or 2… And going to the restroom was a total PITA but I have faith that you’ll be able to pull this off in a much more comfortable fashion.
This costume consists of the following:
- White tank top
- Solid white skirt – this is a great option because the denim adds more stability for all of the items that will be hanging from it
- Clear plastic ornaments
- Solid white ornaments
- Loofah (at least 2-3)
- Rubber ducky
- Any other bath toys that can easily be pinned to clothing
- Safety pins
Before getting your costume together for wearing, be sure to have your hair and makeup ready. Putting on your costume last will make your life soooo much easier, trust me on this one! For a cute, more realistic touch, wear a shower cap! I wish I would’ve done that back when I wore this look.
Begin by laying your skirt and top out on a table and start pinning the “bubbles” aka the plastic ornaments to your clothes. Space them out in a way that won’t look cluttered. Next, pin the extras (loofahs, rubber duckies, etc.) in the empty spaces. Try to leave at least some space between your objects to help keep them from rubbing into each other and potentially falling off. Pro Tip – tie a ribbon around the neck of the rubber ducky and pin the ribbon to your outfit. Without the ribbon, it would be pretty much impossible to pin that plastic toy to your outfit. Think outside of the box and get creative when pinning things to your outfit! 🙂


I look just like an actual bubble bath, don’t I?! I wore heels but I honestly thin that flip flops would look so much better. Fun tip – carry some bubbles with you and randomly blow bubbles to give your costume an awesome 3D effect!
7.Mermaid Princess
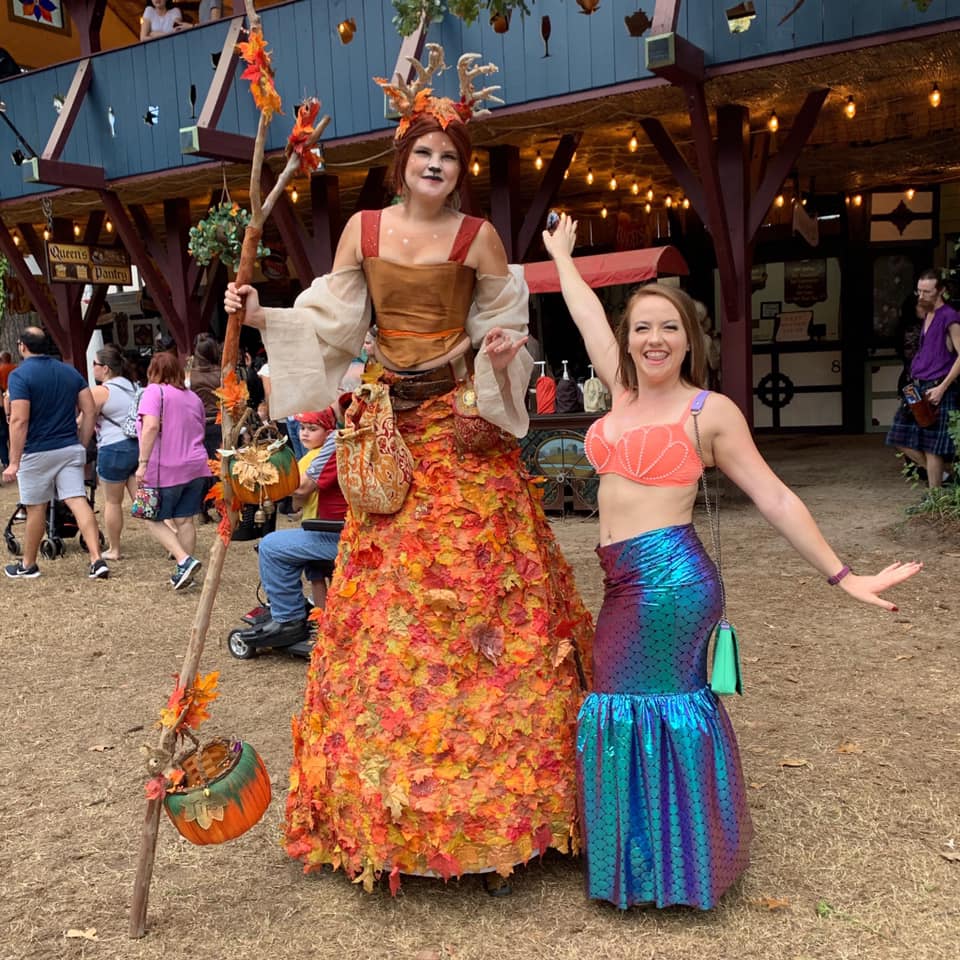
I chose to include my mermaid costume because I am so incredibly proud of it! This is actually the second mermaid costume that I’ve made – the first one was for me to go as Ariel in 2018. I used the bottom part of my Ariel skirt (pictured below) to create this shiny Mermaid Princess skirt and I used the same technique from the first seashell bra to create my second one.
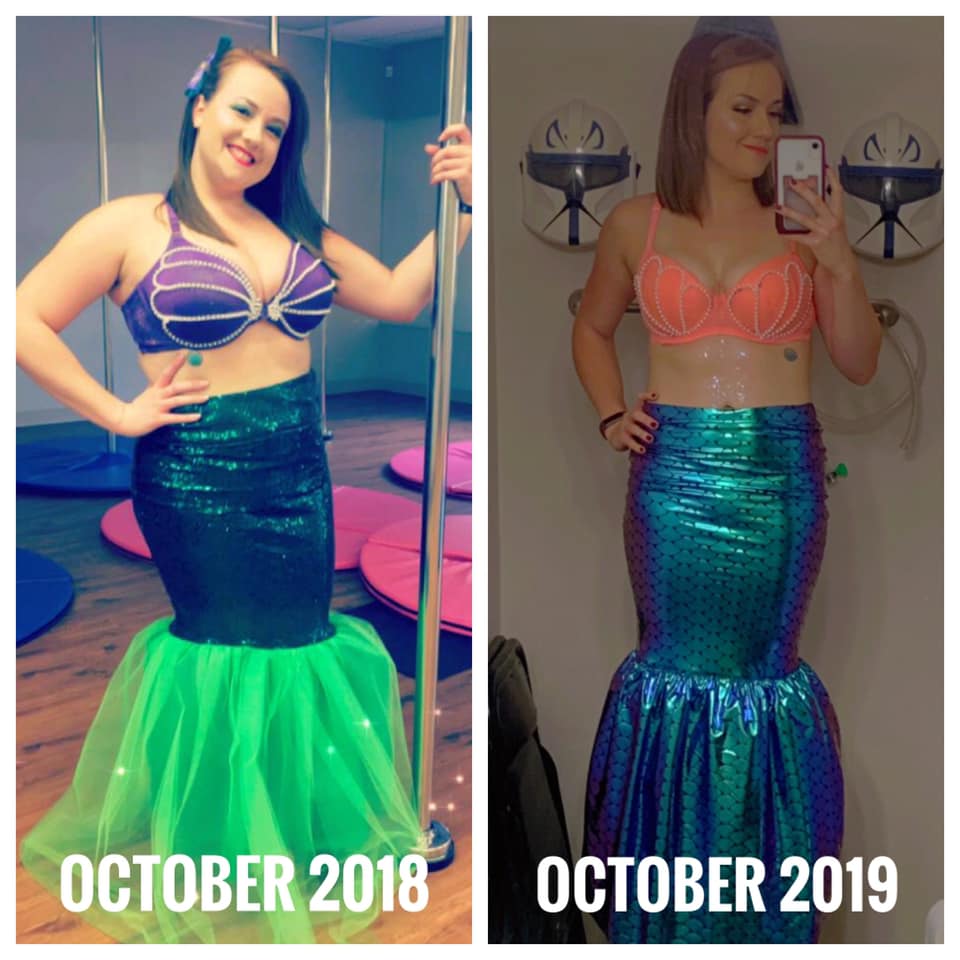
Ariel’s seashell bra was a white bra that I spray painted purple using purple fabric spray paint. Next, while wearing the bra, I used fast-drying fabric glue to glue a string of pearls in the shape of a seashell. That entire process was time consuming and difficult AF but totally worth it in the end!! Wearing a bra that fit my boobs perfectly that also looked like a seashell was waaaaay more comfortable than wearing some cheap seashell top I could’ve bought at a party store. Maybe next year I’ll make a tutorial on how I was able to accomplish this. Drop a comment and let me know if you want me to and we’ll go from there! 😉


Keep in mind that while some of these supplies might seem a little pricey, I always use in-store coupons at Joann’s and Michael’s in order to not pay full-price for the things that I need. I would sometimes even take it as far as going to multiple stores and buy one item from each in order to maximize savings with the coupons.
I hope that this article is not only helpful to you, but will inspire to use your creativity to create whatever costume your heart desires! My favorite part about dressing up in costumes is that you can be whoever you want to be – the sky’s the limit! Drop a comment and share which of these 6 costumes you’re interested in creating for yourself.
Love all the costumes, your creativity and design abilities really shine.